Sunday 15 February 2009

Drop Necklaces

I bought a kit from BDI a few weeks back, and love the necklace I made. As I had to collect favour bags for my sister from the shop yesterday I got some more beads to make a similar one for a friend.

This is from the original kit...


While here is the one I made for Maria as a thank you....

Wednesday 11 February 2009

Peeled Paint Backgrounds

I played some more tonight turning my photos into background papers. This effect was from a photo of an old door with paint peeling off - and I just had so much fun making these!!!!


Once again feel free to use these backgrounds and let me know if you use them!

Monday 9 February 2009

Background Papers

I bought Photoshop a year ago and have been threatening ever since that I will actually learn how to use it. I usually got as far as opening it up and panicing before giving up.

So a few weeks ago I signed up for Gail Schmidt's - Creating Custom Digital Brushes - over on Creative Workshops. And wow did I learn a lot. I have to say Gail is a great teacher, and so helpful when I got stuck (and I did get stuck ;-) although not as much as I'd thought.

The workshop is in the form of an online video which you can stop and start and work through as you play along in photoshop.

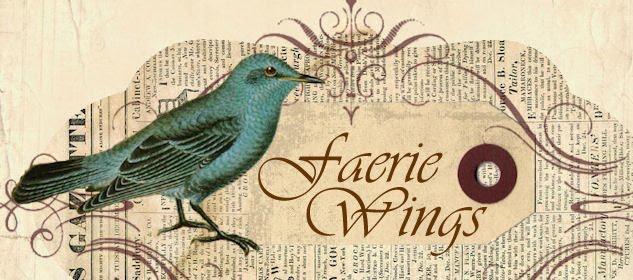
I created these 2 background papers, which are designed as 5x7 inch, from what I learned in the work shop using my own images.

Please feel free to help yourself to these backgrounds, and if you make something please share, I'd love to see it.


Gail is running another workshop at the end of the month in Digital Collage for Photoshop which I can't wait to start now ;-) Thanks Gail!

Tuesday 3 February 2009

One Lovely Blog


I was so honoured and excited to get this award from the talented Inka - I had to share it. I have so many talented blog friends, I really don't think my own work is that good by comparison, so this award really touched me.

I'm not naming anyone as such, but you all know from my comments on your blogs that I love your friendship and inspiration and think you all have "One Lovely Blog".

Monday 2 February 2009

Wire Wrapping

While visiting BDI - the fabulous Bead shop in Bray at the weekend, I was lucky to get one-on-one instruction from the staff on wire wrapping stones. A forum friend of mine asked would I share what I'd learnt so here it is.

I'm new to this, so I don't suggest I can offer the best advice on technique, but I did enjoy working on this project at home, and I hope you like it. Or if you have any tips, hints or tricks to share please leave a comment ;-)

REQUIRED:
  • Stone
  • Wire: 20 guage (ga) and 24 ga
  • Masking tape
  • Tools: wire cutters, round nose pliers, flat nose pliers


INSTRUCTIONS:
  • Cut 2 lengths of 20 ga wire approximately 3 times the circumference of the stone

  • Hold the lengths side by side and wrap the 24ga wire around the centre point approximately 7 or 8 times. Start and end the wrap at the same side so the rough edges face into the stone, trim the ends and make flush with flat nose pliers

  • Repeat wrap to either side - keeping the original wires in line with each other

  • Wrap the wires around the stone with the binding wraps at central points on 3 sides
  • Tape the wires in place to hold


  • At the top bend the wires using the flat nose pliers to meet at a 90 degree angle pointing up - do not let the wires cross over each other


  • Using the 24 ga wire wrap the adjoining ends together

  • Using the flat nose pliers start to bend the wires around the stone - the tension added to the wire at this stage holds the stone in place securely, you can remove the masking tape


  • At the top bring 2 wires to the fore and bend 2 back out of the way


  • Form a loop by bending the front wires back - either freehand or using a pencil or similar to shape

  • Fold completely behind and wrap down with 20ga


  • You can snip off any excess and complete the stone at this stage or continue to embellish the stone further
  • I added some celtic swirls using the excess wire - I curled the ends of both 20 ga wires and interlinked them with the wire wrapping the stone to hold in place securely


  • I then curled the 24 ga from the top to create the final swirl


Christmas Tag

I've been meaning to blog this since Christmas! I made this tag to go with a Secret Santa pressie. It was good fun getting dirty with gesso and acrylics and I liked the alternative christmas colours that I achieved.

Wow it's Really Snowing

I was glad to get home tonight as the roads were treacherous driving from the train station. But what fun I had when I got home. Just outside our house lots of neighbours were building snowmen, and it was so much fun chatting, throwing snowballs and larking around.


We don't normally get quite so much snow here so it was a real thrill. Not sure how I'll get to work tomorrow -but for now I'm having lots of fun being a kid again ;-)